· 2 min read
Bowei Xiao

In the future, the interface and interaction should not be constrained to 2D display and visual elements. As one of many future interactive directions, spatial interaction is the most tangible method that integrates different sensory I/O, bringing the usability and user experience to the next level.

HoloLens stands for the Mixed Reality glasses released by Microsoft. With a bundle of sensors in front of the glasses, HoloLens can project virtual elements in physical spots (spatial awareness), recognizing the hands and the basic hand gestures that allow users to interact spatially without additional remotes.

In this section, I tend to build the resizing interaction based on physical gestures (dragging & tapping) to see how the 3D object in the spatial interface has been precisely manipulated.

The outcome shows as follows:

  1. The object can be zoomed in three dimensions by grasping the handles on the edges.
  2. When the handle is active, the number panel automatically pops up and follows the handle.
  3. On the number panel, the current length of the configuring dimension will update in real-time.
  4. The panel is interactable. It'll call the floating numpad that gives precise numbers directly.

Inspired by default resizing interaction in MRTK3 (Mixed Reality Toolkit 3) The primary controllers are divided into three levels:

HandleController - The detailed interaction on each handle

BoxController - The auto-snap box will snap on objects dynamically

BoundsController - The Resizing logic controller

implementation structures

· 3 min read
Bowei Xiao

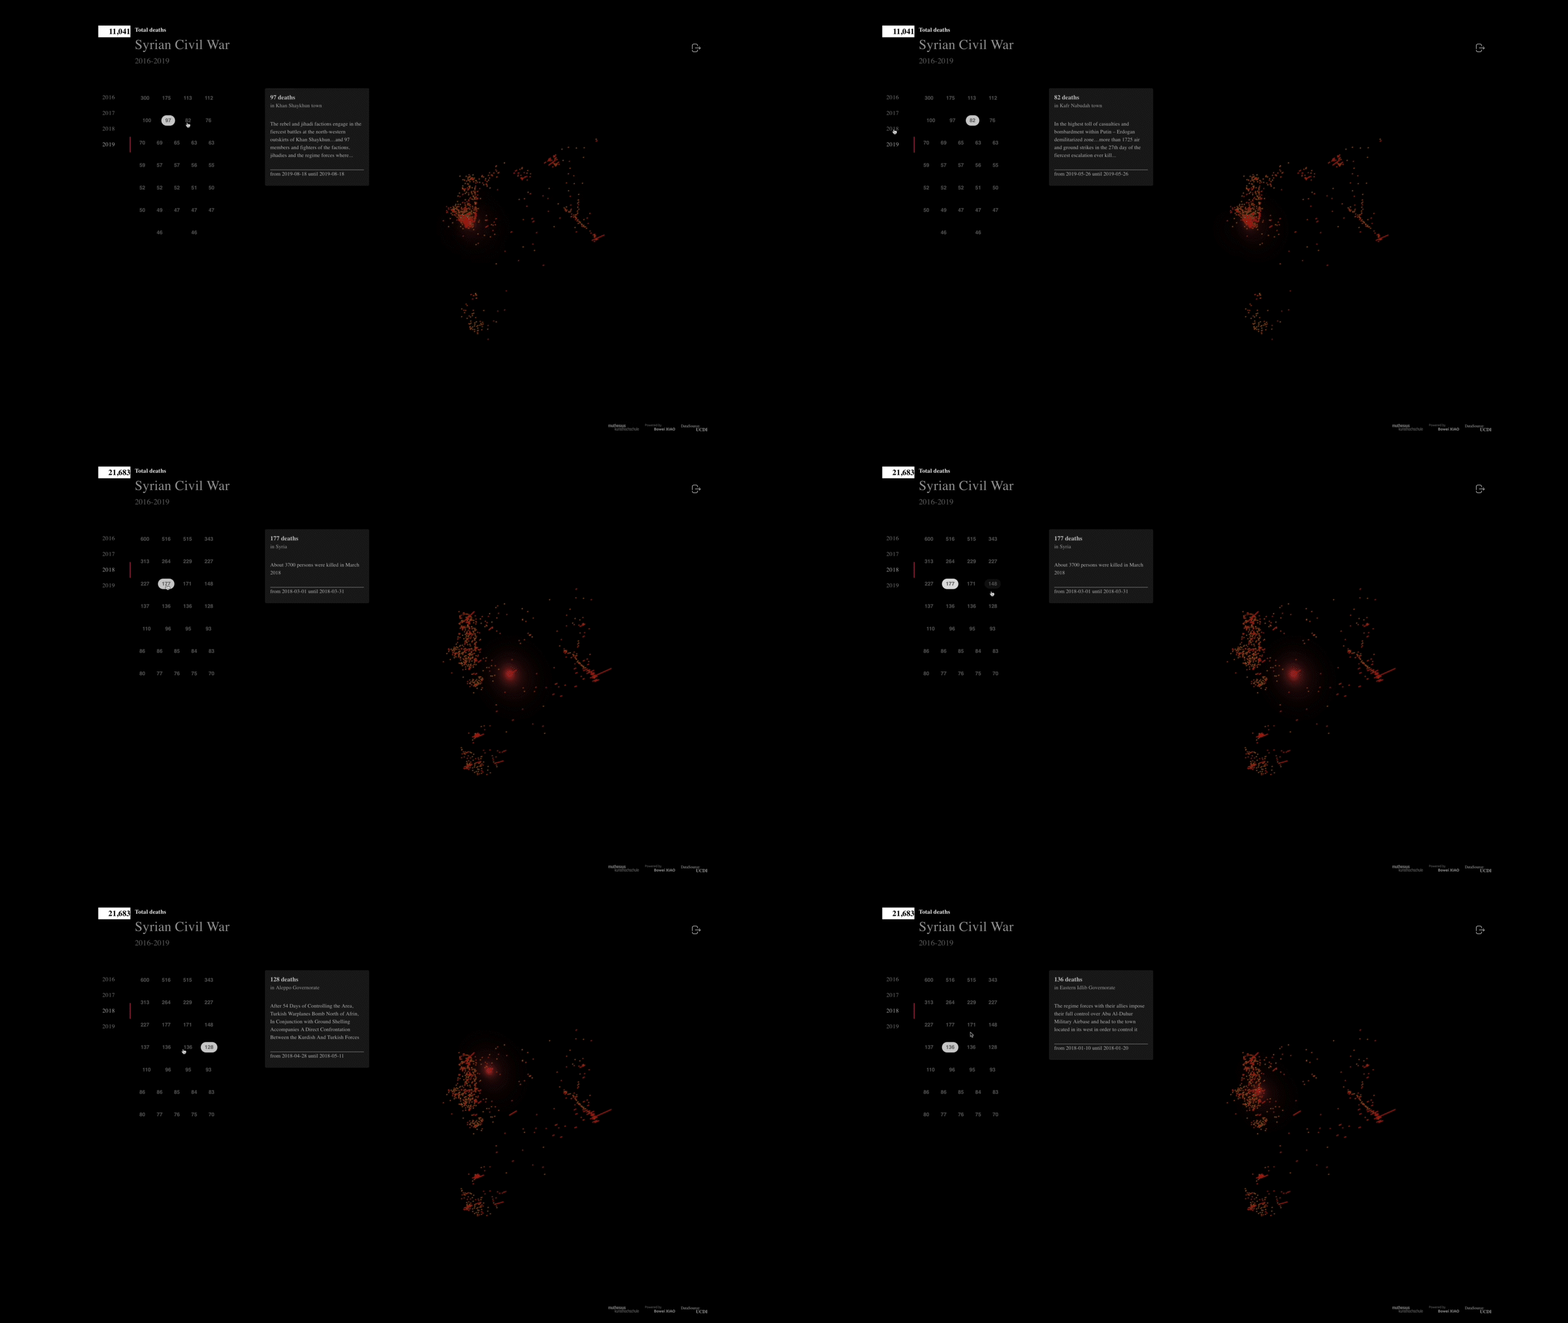
First, this is the final front-end interaction looks like: interaction sample

From the technical point of view, The interactive data visualization involved over 10,000 data strings and a series of states that frequently updating and synchronizing in different components. So I decided using Redux for managing the state and monitoring the events.

info

Redux is a pattern and library for state managing. It serves as a centralized store for state that needs to be used across entire applications. For more information please check out Redux Intro.

In general, the interaction design consists of two parts: 3D globe in WebGL and UI elements.

  1. GeoSyria.Container - read only the coordinates data and deaths number of individual battle.
  2. GeoSyria.UI - read and update the state of application.

Here is the data flow of the frontend application:

redux data flow diagram

Basic components of Redux

  • ActionTypes - differentiate the interactive types that can be synchronized between reducer and ActionCreators.
export const ACTION_TYPES = {
DATA_LOAD: 'data_load',
DATA_FILTER: 'data_filter',
DATA_SUM: 'data_sum',
DATA_DETAIL: 'data_detail'
}
  • Reducers - Copy, Update states (aka. data) when actions are triggered.

the reducer always accepts two parameters initialState and action:

export const dataReducer = (initialState, action) => {
console.log("dataReducer: " + action.payload);
switch (action.type) {
case ACTION_TYPES.DATA_LOAD:
return {
...initialState,
[action.payload.dataType]: action.payload.conflictList
};
case ACTION_TYPES.DATA_FILTER:
return {
...initialState,
[action.payload.dataType]: action.payload.filter,
[`${action.payload.dataType}_param`]: action.payload.param

...
  • storeData - store the data and wrap it into the react components that interact with the data.
...

export const storeData = createStore(dataReducer, applyMiddleware(asyncActions));

...

<Redux.Provider store={storeData}>
<GeoSyria.UI />
<GeoSyria.Container />
</Redux.Provider>
  • Redux.connect - For those components, who are involved in the interaction with data, it's important to connect the state and dispatch (aka. actions) using Redux.connect.
const mapState = storeData => ({...storeData})

const mapDispatch = {
...Actions
}

export default connect(mapState, mapDispatch)(class extends Component {
render() {
return
<React.Fragment>
{this.props.coordinate && <GeoSyriaUI {...this.props} />}
{this.props.coordinate && <GeoSyriaContainer coordinate={this.props.coordinate} filter={this.props.filter}
details={this.props.details}/>}
</React.Fragment>
}

// first data query when application loading
componentDidMount() {
this.props.getData(DATA_TYPES.COORDINATION)
this.props.getTotal(DATA_TYPES.SUM)
}
})

Trigger actions

After the preparation in the redux components, the actions and states are automatically stored in the react components' props, call the action will update the state globally.

In the button component:

export const TabPanel = ({coordinate, getDetail, cleanDetail, details, checked}) => {
const classes = useStyles();
const handleClick = id => {
details._id === id ? cleanDetail(DATA_TYPES.DETAILS) : getDetail(DATA_TYPES.DETAILS, {id});
}

...

The getDetail and cleanDetail are functions for queries that store in the ActionCreators:

export const getDetail = (dataType, param) => ({
type: ACTION_TYPES.DATA_DETAIL,
payload: dataQuery.getBasicData(dataType, param).then(response => ({
dataType,
detail: response.data
}))
})

export const cleanDetail = (dataType) => ({
type: ACTION_TYPES.DATA_DETAIL,
payload: {
dataType,
detail: null
}
})

· 2 min read
Bowei Xiao

There are two key components to make MongoDB accessible and serve as a server.

  1. MongoClient provided by the mongodb libs from MongoDB provider.
  2. Expressjs as the server hosting.

Here is the basic workflow diagram of MongoDB access

connection diagram

Database connection

MongoClient:

MongoClient.connect(mongoUri, {useNewUrlParser: true, useUnifiedTopology: true})
.catch(err => {
console.log(err);
process.exit(1);
})
.then(async db => {
await GedsyriaDb.DbAccess(db);
app.listen(serverPort, () => {console.log(`listen on port ${serverPort}`)})

});

DBAccess:

After the connection succeeds, passing the DB entity into DBAccess to find the suitable collection in the cluster:

    static async DbAccess(conn) {
if (geoSyria) {
return
}
try {
geoSyria = conn.db(db).collection(collection);
} catch (e) {
console.error('Uable connect to Database...' + e.message);
}

}

Server host

Now using expressjs to host the server; from the design, we are querying 3 types of data:

  1. general data - the Latitude and Longitude data strings help the frontend locate the right spot on the 3D globe.
  2. yearly data - the death counts and sorted list (sorting list from server side)
  3. detail data - the details information of the selected string (through id)
...

const app = express();

...

const apiQuery = new express.Router();

apiQuery.route('/').get(apiController.responseData);
apiQuery.route('/year').get(apiController.responseSumData);
apiQuery.route('/id').get(apiController.responseDetailData);

app.use('/api', apiQuery);

module.exports = app;

The typical middleware response function has three input/output pipe: request, response, next, if the request.query has an id or year parameter, the response would trigger the conditional query to the database to get limited results.

static async responseSumData(req, res, next) {
console.log("responseSum_query: " + req.query)
try {
let response = await DbAccess.getSumData(req.query);
if (!response) {
res.status(404).json({api_error: 'Not found'});
return
}
return res.json(response);
} catch (e) {
console.error(`api server: ${e}`)
}
}

As the response conducts the MongoDB query language

arrayPipeline = [
{
$project: {
year: 1,
latitude: 1,
longitude: 1,
deaths_num: '$high'
}
}, {$sort: {deaths_num: -1}}, {$skip: 6}];
return await geoSyria.aggregate(arrayPipeline).toArray();

As a result, the front end will only get the specific data string relevant to the visualization's needs. And lots of calculations will be handled in the database directly, accelerating the interactive experiences.